Azure Active Directory (Azure AD) is a cloud-based identity and access management solution that is popular with businesses looking for an enterprise authentication solution. Azure AD provides secure and seamless single sign-on (SSO) across a broad range of cloud-based and on-premises applications. Microsoft changed the name of Azure AD to Entra ID in the second half of 2023.
Entra ID supports a variety of authentication methods, including passwords, multi-factor authentication, and federated authentication with other identity providers. This flexibility allows businesses to choose the authentication method that best suits their security needs and user experience requirements.
In addition, Entra ID provides robust security features such as conditional access policies, which allow businesses to enforce access controls based on user, device, location, and other factors. This helps to ensure that only authorized users can access sensitive data and applications.
Authenticating a VPN for Azure AD
Using a VPN is critical for Azure – these steps outline how to configure and authenticate using Entra ID in Microsoft Azure Cloud.
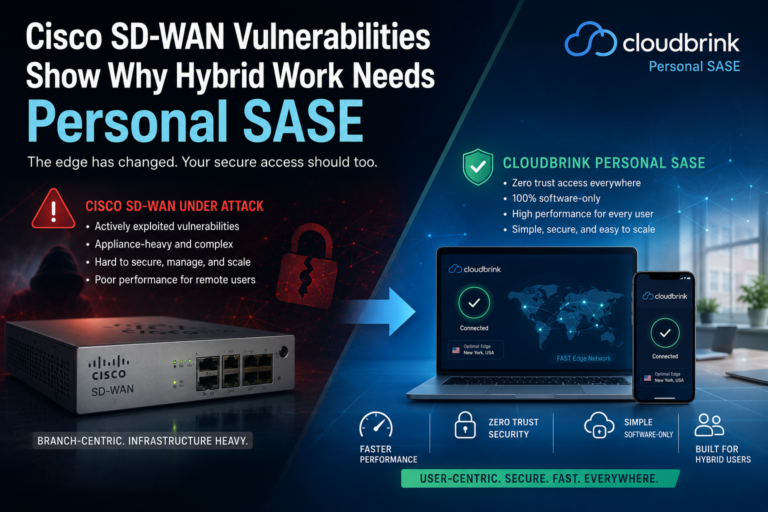
Cloudbrink Authentication and Entra ID
Cloudbrink eliminates legacy VPN and unnecessary SD-WAN architectures and enables employees to work from anywhere in the world on any device, with industry-leading network security and quality of experience that matches that delivered on corporate office networks. Cloudbrink is a 100% software-only solution that increases employees’ productivity while reducing enterprises’ threat surface without requiring any hardware or appliance management by IT teams.
Cloudbrink authentication provides granular role-based access controls, enabling system administrators to assign access to public and private IT resources to different users and groups. Cloudbrink integrates with existing identity and authentication solutions so that IT teams do not have to separately and manually configure remote access permissions.
Entra ID is a fully supported authentication solution that enables modern, sophisticated directory-based identity management and authentication for Cloudbrink deployments. This blog outlines how to configure Cloudbrink to use Entra ID (née Azure Active Directory).
Depending on your Entra ID portal and account settings, some menu options here may look different. But the functionality should be essentially the same, and configuring Cloudbrink to use Entra ID Active Directory will still work.
Steps to Configure Cloudbrink to use Microsoft Entra ID Authentication
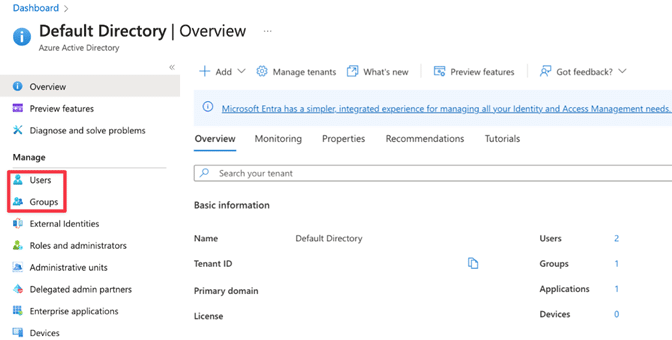
Step 1: Log in to the Entra ID/Azure AD portal at https://aad.portal.azure.com/.
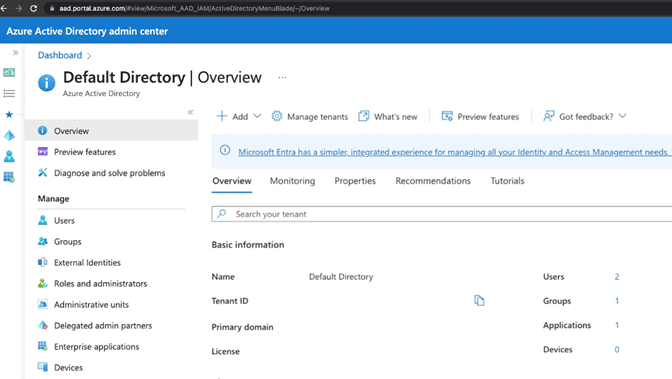
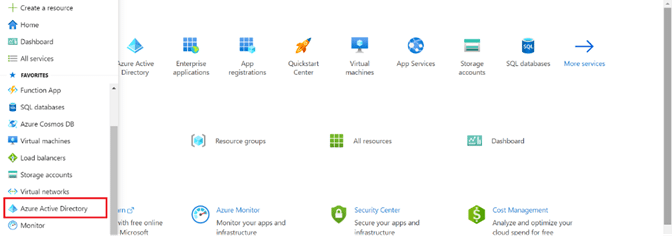
Step 2: Navigate to the Azure Active Directory service configuration section.
Step 3: Optional — Create a Security Group. Some customers create a specific Security Group for Cloudbrink or use an existing group. Cloudbrink configuration supports both approaches.
Step 4: Whichever option you choose in Step 3, make sure that all users who will use Cloudbrink are members of the Security Group(s) you will use.
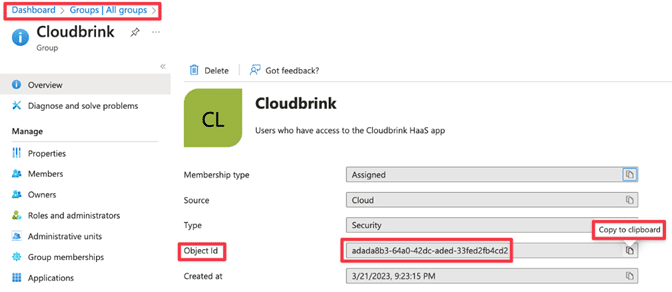
Step 5: For the Group(s) being used in Cloudbrink for authentication, please Add the Object ID in the Configure > User Groups > User Group section of the Cloudbrink Admin Portal.
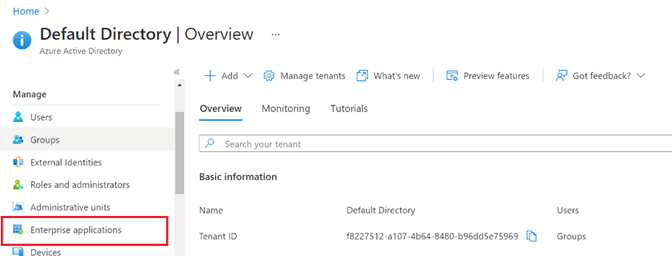
Step 6: Navigate to the Enterprise Applications service under Azure Active Directory.

Step 7: Click the New Application button to create a new application.
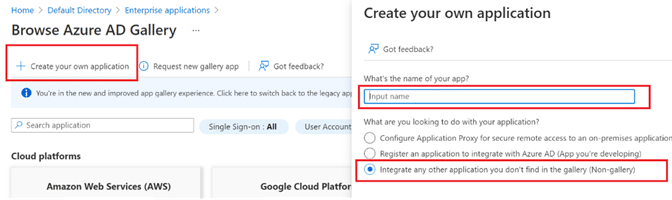
Step 8: Click Create your own application, and in the pane that appears on the right:
- Name the application per business practices (“Cloudbrink” for example)
- Select the Integrate any other application you don’t find in the galley (Non-gallery) option.
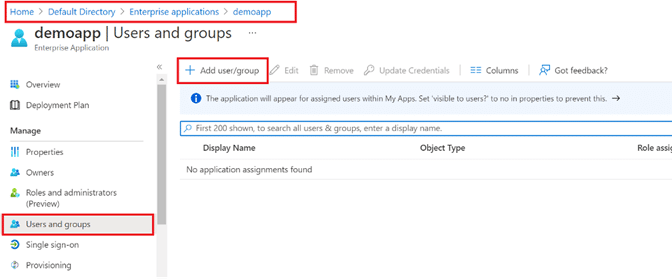
Step 9: Navigate to the newly created app under Enterprise Applications, and click Add user/group.
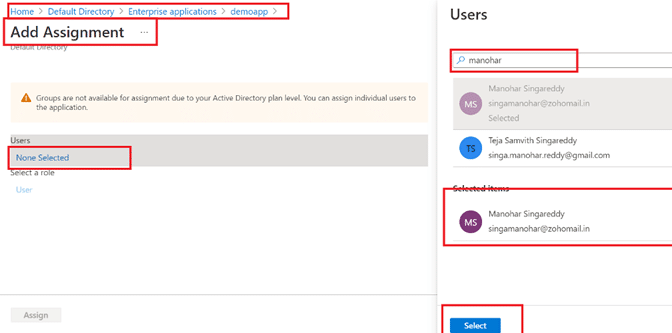
Step 10: Search for and add the Group identified from Step 5 to the application. Alternatively, add individual users, rather than the group, if you want to.
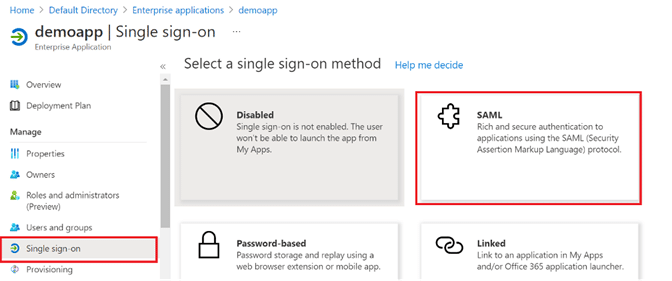
Step 11: Select the Single sign-on option along the left pane of the app, and then click SAML.
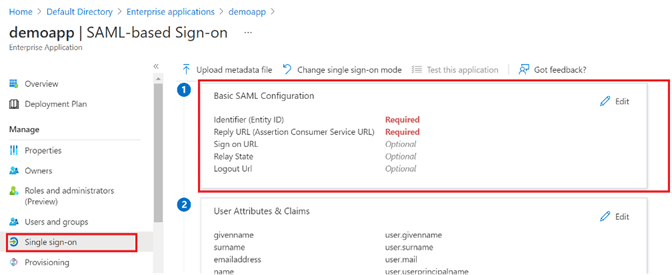
Step 12: Under Basic SAML Configuration (labeled with a 1 in the diagrams below), set the following values (other values can be left blank):
- Identifier: https://wren.cbdev2026.wpenginepowered.com/clb/svc/auth/clb/<name>/<name>
- Reply URL: https://wren.cbdev2026.wpenginepowered.com/clb/svc/auth/clb/<name>/<name>
- Sign on URL: Copy the Login URL value from Set up <App-Name> (labeled with a 4 in the diagrams below) and enter it here, in addition:
- Provide this Sign on URL to Cloudbrink, or
- Add this Sign on URL to the Configure > Policies > Authentication > Login URL section of the Cloudbrink Admin Portal
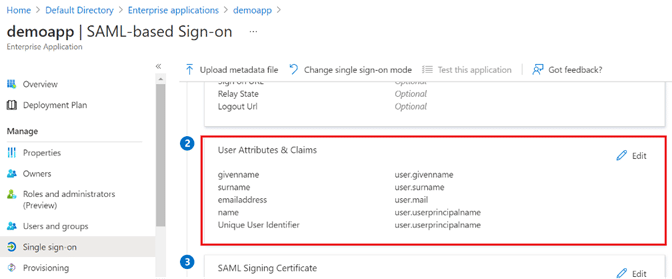
Step 13: Still within the Single sign-on section of the app, under User Attributes and Claims (labeled with a 2 in the diagram below), click Edit.
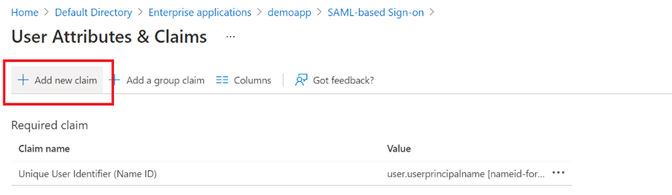
Step 14: Click the Add new claim button.
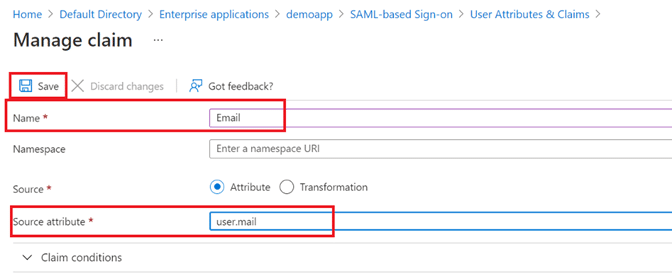
Step 15: Fill out the following fields (non-specified fields can be left as default), then click Save.
- Name: Email
- Source attribute: user.mail
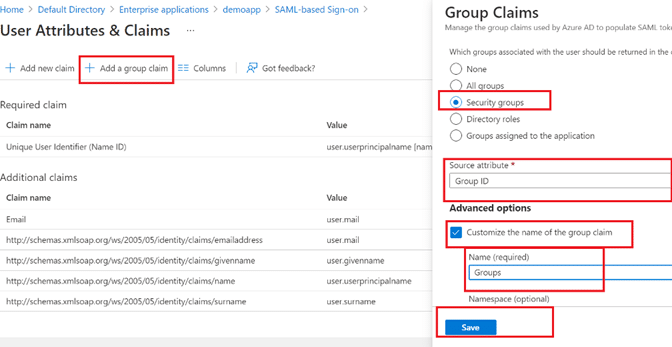
Step 16: Click the Add a Group claim button, and in the pane that appears to the right, fill in the following fields and click Save:
- Which groups associated…: Security groups
- Source attribute: Group ID
- Advanced options:
-
- Customize the name of the group claim: Checkbox selected
- Name (required): Groups
Step 17: Back within the Single sign-on section of the application, under the SAML Signing Certificate section (labeled with a 3 in the diagram below Step 18), either:
- Provide the App Federation Metadata URL to Cloudbrink, or
- Add this App Federation Metadata URL to the Configure > Policies > Authentication > Metadata URL section of the Cloudbrink Admin Portal.
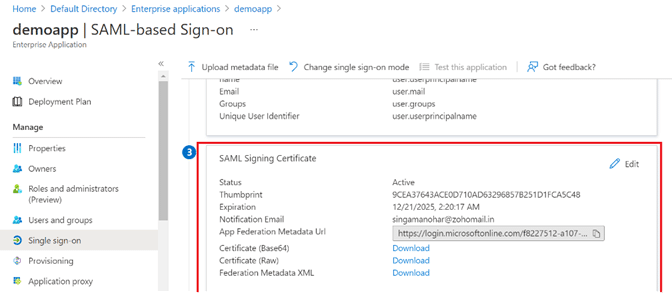
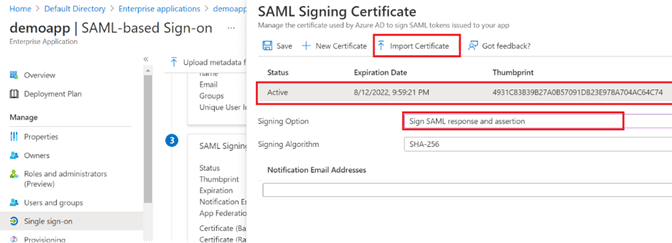
Step 18: Still within the SAML Signing Certificate section (labeled with a 3 in the diagram below), click Edit.

Step 19: In the pane that appears to the right:
- Click Import Certificate, and select the .PFX certificate file separately provided by Cloudbrink
- While importing the file, fill in the password also shared by Cloudbrink
- Ensure the certificate is set as Active
- Change the Signing Option to Sign SAML response and assertion.
Contact Support If You Have Any Issues
If you have any issues configuring your Cloudbrink deployment with the Microsoft authentication configuration outlined in this blog, contact our support team via the form on the contact page.